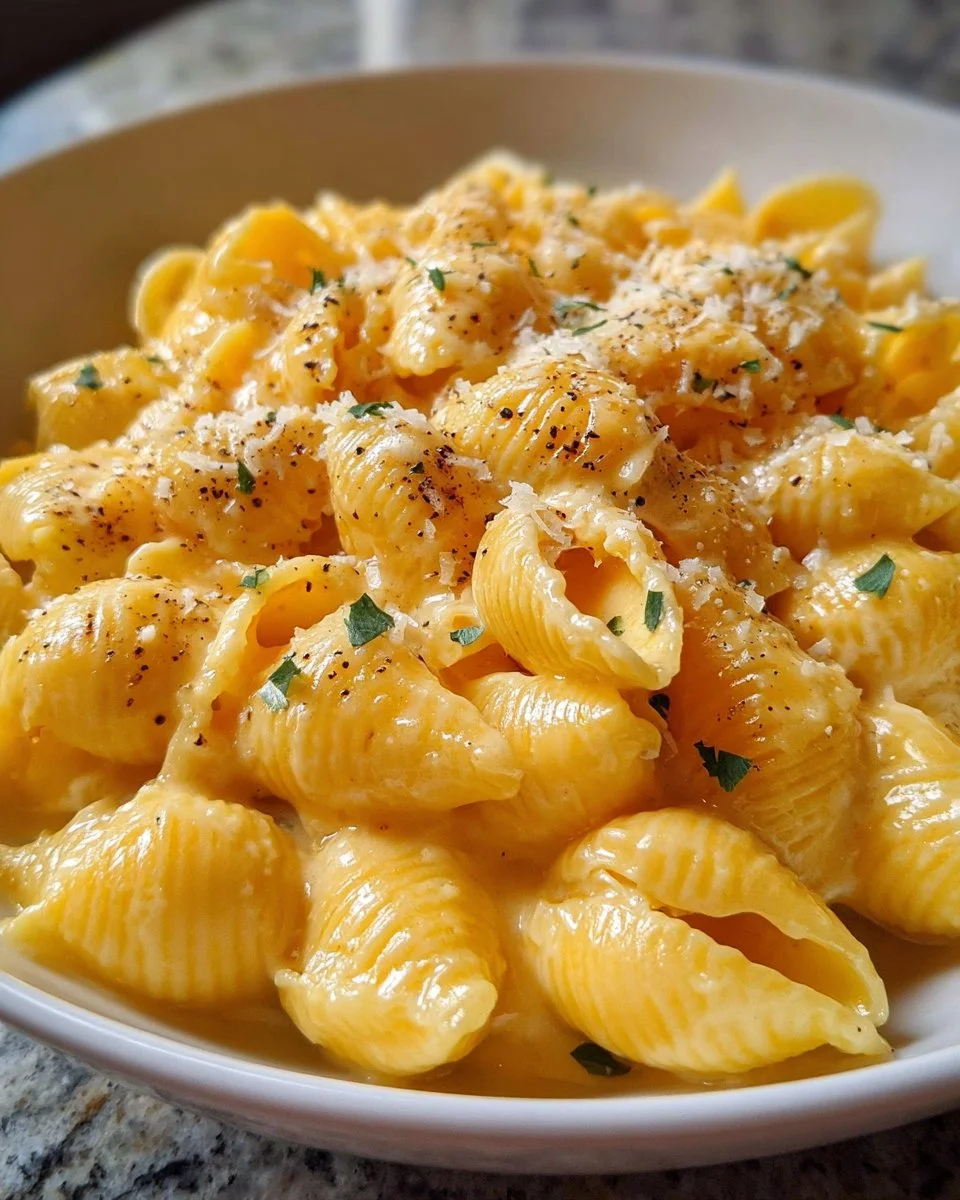
There’s something truly magical about a comforting bowl of homemade shells and cheese. As you lift a spoonful, the creamy sauce glistens, enrobing the al dente pasta shells in a luscious embrace. The moment you take that first bite, the rich, cheesy flavors unfurl, wrapping you in warmth and nostalgia. You savor the playful balance of textures—the soft shells juxtaposed against the silky sauce, creating a delightful mouthfeel that lingers on your palate. The aroma wafts through the kitchen, coaxing everyone to gather around the table, eager for a taste of this childhood favorite brought lovingly into adulthood.
Homemade shells and cheese offer a blissful experience that transcends the mere act of eating. It captures those moments shared with loved ones, laughter echoing around the dinner table, and smiles brightening the room. Each taste floods you with memories of family gatherings or cozy nights in, all while providing an opportunity to create new memories. This dish, with its simplistic yet indulgent charm, deserves a spotlight in your culinary repertoire.
Why You’ll Love This Homemade Shells and Cheese
Every bite of this homemade shells and cheese promises to transport you to a place of comfort. The creamy cheese sauce mingles sumptuous sharpness and gooey delight, giving you the satisfaction that boxed versions simply cannot deliver. Whether it’s a chilly evening or an exciting gathering with friends, this dish fits any occasion perfectly, embodying warmth and hospitality. Not to mention, the customizable aspects allow you to express your culinary flair. You can experiment by introducing different cheese varieties, incorporating veggies, or even adding protein, making it a versatile feast that can cater to any palate.
Homemade shells and cheese also boasts the convenience of pantry ingredients, making it a straightforward option for busy weeknights yet indulgent enough for special gatherings. It stands out as a true labor of love—the kind of meal you whip up not just for nourishment, but to share joy and comfort.
Preparation Phase & Tools to Use
Creating outrageously delicious homemade shells and cheese requires a few essential tools that help make the process smooth and seamless. Here’s what you’ll need:
-
Large Pot: A heavy-bottomed pot helps maintain even heat, ensuring the pasta achieves the perfect tenderness without becoming mushy.
-
Colander: This handy tool makes draining your cooked pasta a breeze, preventing waterlogged shells that could dilute your velvety sauce.
-
Medium Saucepan: A medium-sized pan is perfect for creating the cheese sauce, providing enough space to stir and prevent splashes.
-
Whisk: A good whisk is vital for achieving that smooth, lump-free cheese sauce. It ensures every ingredient blends seamlessly together.
-
Wooden Spoon or Spatula: These help in mixing everything to perfection, especially when folding the creamy sauce with the pasta shells.
Practical Preparation Tips
- Always salt your pasta water generously; it enhances the shell’s flavor, ensuring your dish tastes restaurant-worthy.
- Gather all your ingredients before starting to streamline the cooking process—no one wants to hunt for cheese mid-recipe!
Ingredients for Homemade Shells and Cheese
Let’s dive into the heart of this comforting dish with the ingredients that work their magic together to create that mouthwatering, creamy experience.
-
2 cups pasta shells: These durable pasta pieces hold onto the cheese sauce perfectly.
-
2 tablespoons butter: Unsalted is preferred, allowing you to control the saltiness of the dish.
-
2 tablespoons all-purpose flour: This serves as a thickening agent, creating a luscious roux that elevates the sauce.
-
2 cups milk: Full-fat milk delivers a rich consistency, but you can use almond or oat milk for a dairy-free option.
-
2 cups shredded cheddar cheese: The star of the show, it provides that iconic sharp and creamy flavor. Feel free to substitute with your favorite cheeses like Gruyère or mozzarella for variations.
-
1/2 teaspoon garlic powder: This adds warmth and depth to the dish without overpowering the cheese.
-
1/2 teaspoon onion powder: A hint of sweetness that enhances the overall flavor profile.
-
Salt and pepper, to taste: Essential for seasoning—never underestimate the power of adjusting these!
How to Make Homemade Shells and Cheese
Creating this delightful dish unfolds in a series of simple yet rewarding steps, each bringing you closer to that gratified moment of indulgence.
-
Cook the Pasta Shells: Fill a large pot with salted water and bring it to a rolling boil. Carefully add the pasta shells, cooking them until they reach a perfect al dente texture, according to package instructions. Drain the shells using a colander—let them sit while you craft the cheese sauce.
-
Melt the Butter: In a medium saucepan over medium heat, allow the butter to melt gently until it bubbles softly without browning.
-
Whisk in the Flour: Stir in the flour, whisking constantly for about a minute to form a roux. This step creates a base for your luscious cheese sauce.
-
Gradually Add the Milk: Slowly pour in the milk while continuing to whisk. This technique ensures a smooth consistency without lumps. Keep whisking until the mixture thickens, which should take about 3–5 minutes.
-
Stir in the Cheese: Remove the saucepan from heat and mix in the shredded cheddar cheese, garlic powder, onion powder, salt, and pepper. Whisk enthusiastically until the cheese melts completely, forming a silky sauce that beckons for your pasta.
-
Combine with Pasta: Gently fold the cheesy goodness into the cooked pasta shells, making sure each shell receives a generous coating.
-
Serve Warm: Scoop those heavenly shells into bowls, sprinkle with a touch more cheese if you desire, and bask in the smiles and appreciation of your new favorite dish.
Chef’s Notes & Helpful Tips
-
Make-Ahead Tips: You can prepare your shells and cheese up to a day in advance. Prepare everything, then cover and refrigerate. When you’re ready to serve, reheat gently on the stove, adding a splash of milk to loosen the sauce.
-
Cooking Alternatives: If you’re feeling adventurous, try baking your shells and cheese for a crispy top. Transfer your mixture to a baking dish, sprinkle with breadcrumbs and an additional layer of cheese, then bake at 350°F (175°C) until golden and bubbly.
-
Customization Ideas: Feel free to boost nutrition and flavors! Add in sautéed spinach, broccoli, or even crispy bacon bits. The possibilities are endless.
Common Mistakes to Avoid
Creating this creamy delight sounds simple, but a few common pitfalls could affect your outcome:
-
Overcooking the Pasta: Ensure you cook the pasta until al dente. Overcooked shells will become mushy and lose their delightful structure.
-
Not Whisking Enough: If lumps create in your sauce, it’s often due to not whisking thoroughly while adding the milk. Keep that arm moving!
-
Skipping Seasoning: Don’t underestimate the importance of salt and pepper! These seasonings enhance the inherent flavors of your dish.
What to Serve With Homemade Shells and Cheese
Pair your shells and cheese with delightful accompaniments to create a well-rounded meal worthy of any gathering. Consider these ideas:
-
Steamed Broccoli: Brightened with lemon juice, this veggie complements the richness of the cheese.
-
Garlic Bread: A crusty loaf spread with butter and garlic adds crunch and flavor.
-
Simple Green Salad: Light and refreshing, a salad with a tangy vinaigrette cuts through the creaminess.
-
Grilled Chicken or Sausage: Adding protein transforms your shells into a hearty main dish.
-
Roasted Vegetables: Seasonal sides add a great contrast in flavors, like roasted carrots or Brussels sprouts.
-
Corn on the Cob: The sweetness of corn pairs beautifully with cheesy pasta.
Storage & Reheating Instructions
To preserve the integrity of your shells and cheese, store any leftovers in an airtight container in the refrigerator for up to 3 days. When reheating, splash a touch of milk or cream into the mixture to restore that creamy consistency, heating it gently on the stovetop or in the microwave.
For longer storage, you can freeze your shells and cheese. Transfer them into freezer-safe containers, and they can last up to 2 months. Thaw overnight in the refrigerator prior to reheating.
Estimated Nutrition Information
While enjoying your homemade shells and cheese, here’s an approximate breakdown of nutrition per serving (based on a recipe serving 4):
- Calories: 450
- Protein: 20g
- Carbohydrates: 45g
- Fat: 22g
- Fiber: 2g
- Sodium: 700mg
(Disclaimer: Values will vary based on brand and preparation methods.)
FAQs
Is it possible to make this dish gluten-free?
Absolutely! Substitute regular pasta with gluten-free shells. The recipe remains delightful without sacrificing taste!
Can I use pre-shredded cheese?
While you can use pre-shredded cheese for convenience, shredding your own enhances the melting quality and flavor due to the absence of anti-caking agents found in packaged cheese.
How can I make this dish spicier?
If you crave a kick, add a pinch of cayenne pepper or a splash of hot sauce into your cheese sauce for a deliciously spicy twist.
Can I bake homemade shells and cheese?
Yes! For a crunchy topping, transfer your pasta to a baking dish, sprinkle with breadcrumbs, and bake at 350°F (175°C) until bubbling and golden on top.
How do I store leftovers properly?
Allow your shells and cheese to cool completely before transferring them to airtight containers. They’re best consumed within 3 days, but freezing is a great option for longer storage!
Conclusion
With its creamy texture, robust flavors, and endless customization options, homemade shells and cheese captures the essence of comfort food. This delightful dish nourishes not just the body but also the heart, encouraging connection and joy among those who partake. Whether you’re enjoying it solo on a cozy evening or sharing it with loved ones, this recipe promises to be a cherished addition to your culinary adventures. So, gather your ingredients and dive into this creamy goodness—you won’t regret it!
Print
Homemade Shells and Cheese
- Prep Time: 15 minutes
- Cook Time: 20 minutes
- Total Time: 35 minutes
- Yield: 4 servings 1x
- Category: Main Course
- Method: Stovetop
- Cuisine: American
- Diet: Vegetarian
Description
A comforting bowl of homemade shells and cheese that captures warmth and nostalgia with its creamy sauce and al dente pasta shells.
Ingredients
- 2 cups pasta shells
- 2 tablespoons unsalted butter
- 2 tablespoons all-purpose flour
- 2 cups full-fat milk
- 2 cups shredded cheddar cheese
- 1/2 teaspoon garlic powder
- 1/2 teaspoon onion powder
- Salt and pepper, to taste
Instructions
- Cook the Pasta Shells: Fill a large pot with salted water and bring to a boil. Add pasta shells and cook until al dente, then drain.
- Melt the Butter: In a medium saucepan over medium heat, melt the butter until bubbling.
- Whisk in the Flour: Stir in the flour, whisking constantly for about a minute to form a roux.
- Add the Milk: Slowly pour in the milk while whisking to ensure a smooth consistency. Whisk until thickened, about 3–5 minutes.
- Stir in the Cheese: Remove from heat and mix in the cheddar cheese, garlic powder, onion powder, salt, and pepper.
- Combine with Pasta: Fold the cheese sauce into the cooked pasta shells until coated.
- Serve Warm: Serve the shells in bowls and enjoy immediately.
Notes
You can prepare shells and cheese a day in advance. Reheat gently with a splash of milk. For a crispy top, bake with breadcrumbs and cheese at 350°F (175°C).
Nutrition
- Serving Size: 1 serving
- Calories: 450
- Sugar: 5g
- Sodium: 700mg
- Fat: 22g
- Saturated Fat: 13g
- Unsaturated Fat: 9g
- Trans Fat: 0g
- Carbohydrates: 45g
- Fiber: 2g
- Protein: 20g
- Cholesterol: 60mg